1. Installation »
Demo (Flash - quicktime)
3. Run Programs »
Demo (Flash - Quicktime)
Objectives
- Install the Windows version of SPIM and configure it to run assembly programs.
- Load small assembly programs in the SPIM environment.
- Run a small assembly program in the SPIM environment.
- Create a small assembly program
To get the most out of these pages check the learner guide. To learn more about SPIM, read the 3-page documentation.
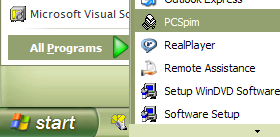
- Download SPIM.
- Unzip pcspim.zip
- Run SETUP.EXE
- Run SPIM
- Setup the simulator
Select menu item Simulator->Settings...
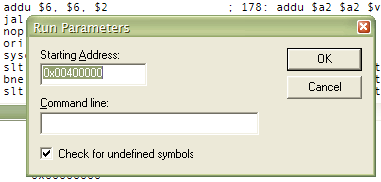
- Check the options as in the following figure
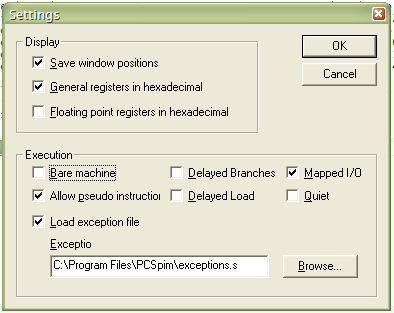
Note: these settings allow you to run programs from the textbook and class notes. More details for later.
Note: You can set your font preferences: select menu item Simulator->Set Font. Set to the smallest font you are comfortable with.
<< page top
- Download sample.s - [view]
right-click mouse, select Save Target As...
- Load sample.s into SPIM:
select menu item File->Open.
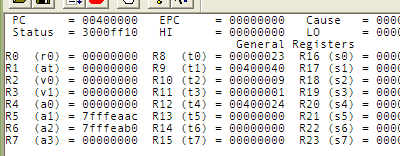
- Initialize the program registers:
select menu item Simulator->Set Value
try $t2=9, $s0=7, $t4=0x00400024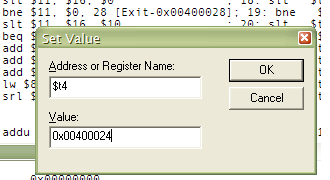 later you can use better ways to input data into programs
- If input registers are loaded correctly screenshot, run program (otherwise return to last setp):
select menu item Simulator->Go, or press F5,
or click the Go button on toolbar
 .
. -
Enter program command line parameters:
simply click OK, or press ENTER (type the shown address if necessary)
- "Registers" window (top part) show final values of CPU registers.
note that $t0 holds the hex value 0x00000023 (decimal 35) which is the opcode for lw.
Problem? Simply relaod (select Simulator->Reload sample.s) and run again (back to 3a step 3 above). You may need to do that more than once.
3b. Re-run Program
Select Simulator->Reload sample.s then run as in 3a steps 3-5 above
Don't forget to (re)initialize registers (Step 3a.3 above)
- Select menu item Simulator->Single Step, or press F10.
- Press F10 repeatedly until the highlight is on line
jal 0x00400024 [main]this instruction jumps to your program which begins at the line labeled main: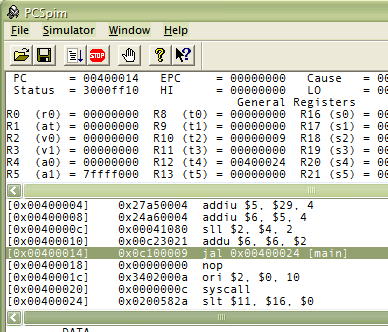 notice that registers have been initialized (see $t2 and $t4), your code starts in memory address 0x00400024, the execution bar is on the jal instruction ready to jump to the first line of your code which starts at label main:
 - Press F10 repeatedly to step through your program.
- Watch CPU registers change after each step.
in particular, watch the program counter (PC)
4. Create Assembly Programs to Run on SPIM
- Type your assembly statements in a plain text editor
for example, use Notepad (under All Programs -> Accessories)
- Label your first statement "main:"
for example,
main: add $s0,$s1,$s2 - Include at the end of your program
ori $2,$0,10
syscall - Save your program file with extension .s
for example: test.s
Tip: format your code in 4 columns to make it more
readable. See sample programs in this site for examples. More on proper format.
Notepad is not the best way to create and edit programs. Use a proper source code editor instead. Here are some recommendations.
- MIPSter (shareware) - recommended option
feature-rich and inexpensive ($10) with a trial version available for download
screenshot
What next?
Start working through SPIM Exercise 0
<< Assembly Unit Home